Ultrasonic Tests for Titanium Grade 2 Seamless Pipes/ Tubes
Generally, ultrasonic tests shall be performed on titanium grade 2 pipes or tubes manufactured to ASTM B861 or ASTM B338, respectively. Both longitudinal and transverse discontinuities shall be examined according to ASTM E213. A pulsed ultrasonic angle beam shall be transmitted into the wall of a titanium pipe or tube in the circumferential direction to detect longitudinal discontinuities, while the pulsed ultrasonic angle beam shall be transmitted into the wall of a titanium pipe or tube in the axial direction to search for transverse discontinuities.

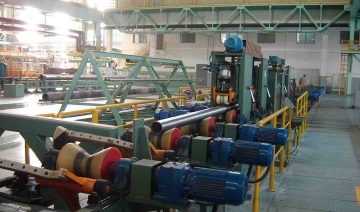
The ultrasonic test performed on a titanium grade 2 seamless tube.
Standardizing or calibration of the ultrasonic system: longitudinal and transverse notches not exceeding 0.010″ (0.25 mm) in width and 10 % of the nominal tube wall or 0.004″ (0.102 mm), whichever is greater, in depth shall be machined on the inner and outer surfaces of the tube. The length of the notches shall not exceed 0.125″ (3.18 mm).

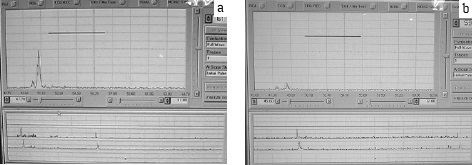
Ultrasonic test results for titanium grade 2 seamless tubes: (a) made by cross-rolled piercing process; (b) made by hot-extruding process.
The ultrasonic test results for two test pieces of grade 2 titanium seamless tubes, which are made by cold cross-rolling process and hot-extruding process, are illustrated in above-presented photo. All results can meet the technical requirements of ASTM E-213. However, the amplitude of noise wave is much smaller in (a) than that in (b).
